


an Open Back Banjo
PART IV: Final Assembly, Fitting, Finishing, and Fretting
Begin by removing all hardware from the banjo body and neck.
FINISHING
No matter which finish you use, my suggestion is that you pad a layer of shellac over the wood. Shellac seals in bad stuff and makes successive coats of other finishes easier to apply. Mixing your own shellac is far better than buying a can off the shelf, especially since pre-mixed shellac has a notoriously short shelf life. This will raise the grain a bit, so you'll need to smooth things out with a Scotch Brite pad or 0000 steel wool.
A single coat of shellac isn't enough. You can check out Stew-Mac for more advanced finishing techniques, but here's an easy technique which should give you great results.
You can build up several coats of shellac. The easiest way to do this is to use a thin mixture of shellac and spray it on, and an artist's airbrush works well for this. You can also pad on additional coats, but this is a little harder because the solvents of the fresh coat tend to dissolve the previous coat. It's hard to say how many coats you will need, but I have found that four seems to be the absolute minimum.
Allow the finish to cure for at least a week, then apply a coat of paste wax with 0000 steel wool. Allow it to sit for a few minutes until it hazes over, then buff it with a rag made of tee shirt material.
FRETTING
There are many ways to put frets into a fingerboard, and this is just one. It works pretty well, though. Begin by making sure that the fingerboard (after it is attached to the neck) is absolutely flat. I use a long sanding block (at least as long as the fingerboard) with 150 or 180 grit sandpaper to make sure that it's level. You can draw some pencil lines along the entire length of the fingerboard, and when they're all gone you'll know that it's flat. Run a fine triangle file into each of the slots. This makes it easier to get the frets in, plus it helps them lie flat once they've been hammered into place.
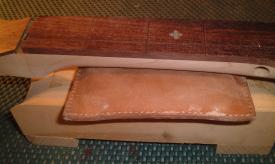
It is absolutely essential that you support the neck. I use this wooden support which has a small, leather, buckshot-filled bag on top of it. A big bag of buckshot also works well.
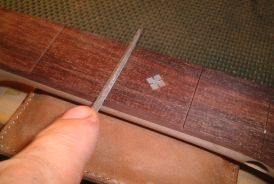
Slightly widen the very top of the fret slot with a triangle file. This is an important step that is often left out. Unless you take this step, you probably won't be able to hammer the frets flat and you'll end up with buzzes and all kinds of problems.
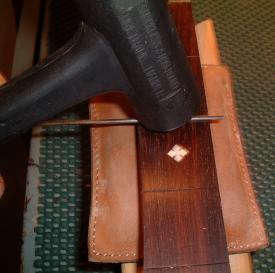
Most books will tell you to cut the fret wire to length, or at least to approximate length, before hammering the frets in place. This is not necessary, and for the beginner, not such a good idea. A longer fret wire gives you something to hang onto, and by letting the wire overhang on each side you don't have to worry about being too precise in a "right to left" fashion. Hammering mandolin wire into rosewood doesn't take much force at all, and you can gently tap it into place using the plastic face of the fret hammer. Don't try to drive it in quickly with a mighty whack or you'll leave hammer rings.
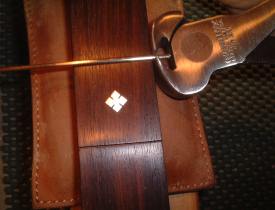
You can use flush-cutting nippers to trim the wire, or you can cut them with a jeweler's saw. You could also cut them with non-flush-cutting nippers and file the excess away.
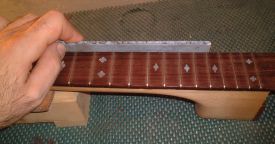
In any case, you'll have to dress the ends of the frets with a file. Hold the file at an angle and file each fret so that both ends taper down to the fingerboard.
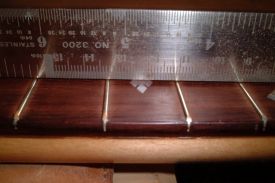
When you're finished, check the fingerboard with a straight edge. You might find a fret or two that is high. Check to make sure that the fret is properly seated against the fingerboard, and if it isn't, you might be able to tap it flush. You can also file the top of the fret flush, but be careful. The top of each fret is rounded, and you'll have to restore that rounded top if you file it flat while leveling the frets.
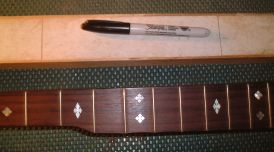
My favorite method, which I learned from the Martin company, is to take a magic marker and darken each fret.
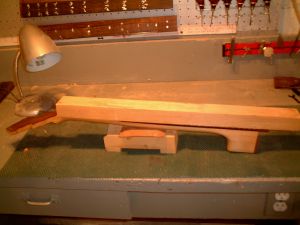
Attach some very fine (maybe 220 or 320 grit) PSA paper to a long, flat surface (block of flat wood) and just "kiss" the tops of the frets. As the ink disappears, you'll see where it's level and where it's not. I also use this same long sanding block to remove any file marks that might have been left when I dressed the ends of the frets.
Installing the tuning pegs.
The four tuning pegs on the peghead simply bolt into the holes, and I usually press the fifth string peg into place with a one-hand clamp.
Installing the Bone Nut
The bone nut should extend at least 1/16 of an inch above the fingerboard. You can shape it with a file, and you might find it helpful to make a couple of "practice" nuts out of hard wood.
Making and Installing the 5th String Nut
5th string nut can be made of bone (a scrap from the nut you just made) or ebony. Chuck the scrap in a drill press and use a file or sandpaper to make it round. Make it the exact size shown in the blueprint, and drill the hole for the in the exact location shown in the blueprint. I drill the hole with a hand chuck and brad point drill bit. Cut a slot in the top of the nut.
Re-Assemble the Instrument.
Since you've done this before it shouldn't be too difficult. This time, when it's all together, string the instrument up but don't bring it up to pitch.
Making the Slots in the Bone Nut
If your neck is the right size, you should be able to use the blueprint to file the slots in the nut. But use your eyes, too. Maybe you'll find that that your neck is too narrow and you'll have to adjust accordingly. Start by nicking the edge of the nut with your file so the strings will stay in place, then attach the strings (including the fifth string) and see how it looks. You will have to add the bridge at this time, too. The bridge is located 26 3/16" from the nut, and is held in place by the pressure of the strings. You might find that you need to make some adjustments, but if everything is okay, deepen the nicks in the nut until the strings are about .020 of an inch above the first fret. Loosen the strings, remove the nut, and sand or file off the excess material from the nut. The strings should be just below the surface of the nut, not resting in deep grooves. Return the nut to it's proper position and tune the banjo to pitch.
Finishes Touches and Adjustments
You'll probably find that the banjo needs slight adjustments to properly play. There might be some buzzes in the frets or bridge, or maybe the neck seems adjustment . If you have an electronic tuner, you can check the position of the bridge by playing notes at different positions and moving the bridge forward or backwards to correct any problems with intonation. If there is a problem you can't solve, take the instrument to a music shop and let them give it the once over. The techs in a good music shop have worked on many instruments and can quickly and easily find and correct problems that might elude you.