


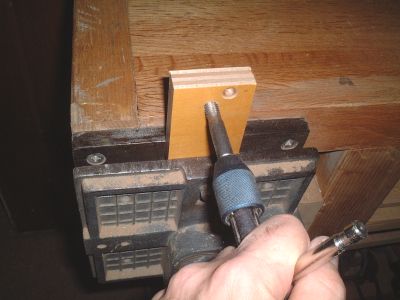
Cut two 2" x 3 1/2" blocks of Baltic birch plywood. About 1" from the bottom of each block drill and tap a hole so that it will accept a 3/8" bolt. Drill two holes and countersinks so that they will accept wood screws.
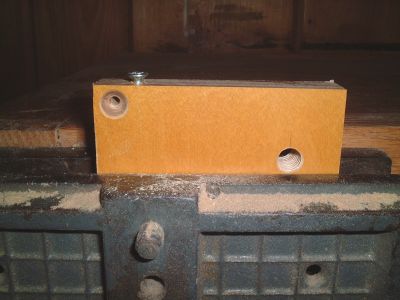
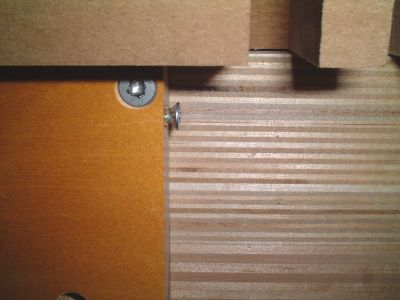
On the inside edge of each of these blocks drill a tiny hole and insert a small wood screw. Position the screws about 1" from the top of each block, and as close to the front edge of the wood as you can get without splitting the wood. (You will need at least 1/4" clearance between the screw head and the inside edge.) Screw the screws in as far as they will go. The two blocks should be mirror images of each other.
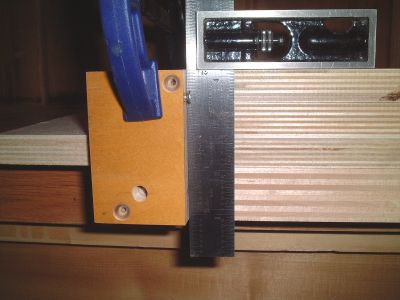
Attach the block flush to the left side of the jig as shown in the photo. Temporarily place the comb in place so you can be sure that everything is going to line up.
Make sure that there is a tad more than half an inch between the screw and the first notch in the comb.
With the comb still in place, attach the block on the right side of the jig. This time you want the screw to almost line up with the edge of the last notch. Don't let the screw extend into the notch area.
Use a mechanical pencil and mark the position of each of the threaded holes, then remove the right and left block and drill a 1/2" hole in the bottom block.
 Cut a piece of 1/4" MDF so it's just wide enough and long enough to cover the exposed edges of the plywood. Screw it in place, and make sure the screws are AT LEAST 1" below the comb or they might come in contact with the router bit. This piece of MDF will come into contact with the bit, and can be replaced if it gets too chewed up.
Carefully position the comb on top of the jig. It should be aligned right-to-left so it is in the same relative position to the left and right blocks.
As you look down through the fingers of the comb, about 3/16" of the MDF should be visible.
 Once you've got it aligned and clamped into place, screw it down. Make sure you countersink the screw heads or they will inhibit the router as you cut your joints.
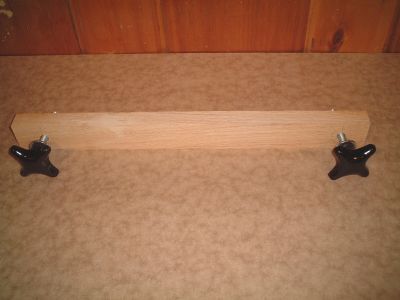
The last piece of the jig is a 1" x 2" length of hard wood (I used oak) that holds the work in place. It has a hole drilled in each end, and is held in place with a couple of knobs that have 3/8" screws. These can be purchased through mail-order supply houses, or you can make your own.
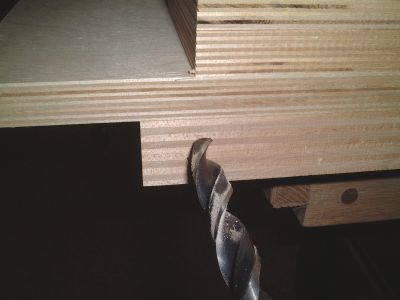
Now you can test your jig. You'll need a 1/2" pattern making bit, which is a kind of bit that has a 1/2" bearing installed at the top. This bit is generally one inch long, which is perfect for this application. Install the bit in your favorite router and adjust it so that one half inch of the bit extends below the fingers of the comb.
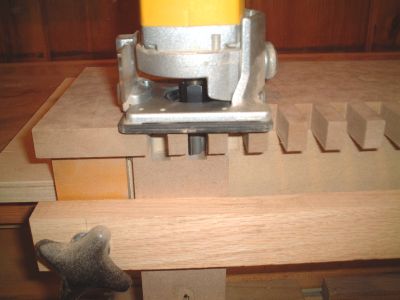
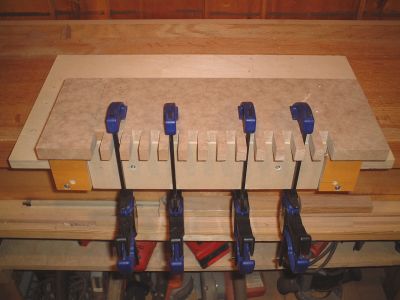
Clamp a piece of half-inch thick scrap wood into the jig. Make sure the top of the wood is flush against the fingers of the comb, and align the left side of the wood against the screw head on the left side of the jig.. Let the router ride up against the fingers of the comb and slowly push it all the way into the wood. If you carefully examine your wood, you'll see that the first finger is wider than the rest, but don't worry about that right now.
Repeat this process with another piece of wood on the right side of the jig.
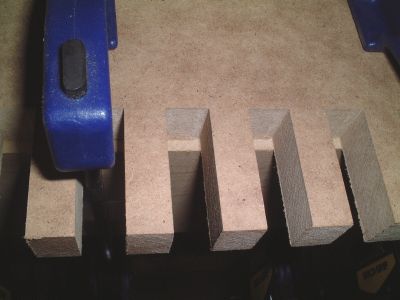
Excluding the first finger, which is probably too wide, all of the rest of the fingers should fit together so they are snug but not too tight. If the spacing is wrong (and is probably is), you'll have to cut another comb.
When you've finally got a comb that is perfect, go ahead and tune up your jig. You'll probably have to re-position the right or left block, and almost certainly have to cut and install another sacrificial piece of 1/4" MDF.
By adjusting the screws in the left block, you can tweak you jig so the the first finger is exactly as wide as the rest. Likewise, by adjusting the screw in the right block the gap on the right side of your jig will be exactly wide enough to accommodate one finger.