


Step-By-Step Instructions for Aligning Your Saw
Handy Jig to Keep Your Saw Aligned
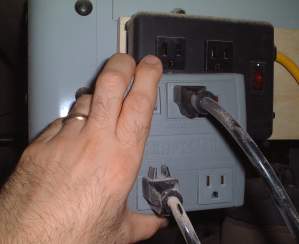
Unplug your saw.
Adjust the Table Top
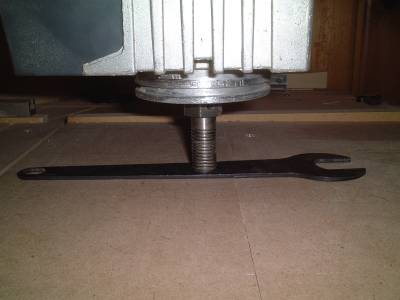 Remove the blade and guards. Rotate the motor until the motor shaft is pointing straight down toward the ground. Place the arbor wrench (or another flat metal object) beneath the motor shaft and carefully lower the arm until the motor shaft barely touches the wrench. Swing the arm right and left, and move the motor in and out. Use the wrench like a giant feeler gauge. Shim the table as necessary to make sure that it is always the same distance from the motor shaft.
Adjust the Radial Arm so the Blade Travels Perpendicular to the Fence
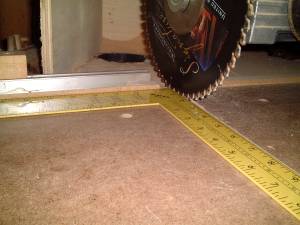
Place a good carpenter square against the fence. Lower the blade so just one tooth barely touches the square. Adjust the arm so the blade travels square to the fence.
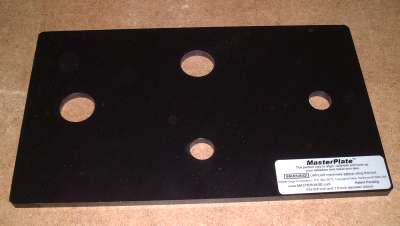
Replace the blade with a flat piece of metal or wood. I am using a product made for aligning table and radial saws, but a hunk of 3/8" MDF with a hole drilled in it would probably work almost as well.
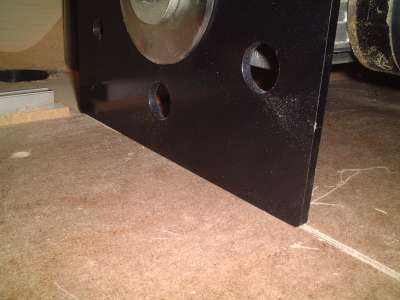
This is how the plate looks when it is substituted for the blade.
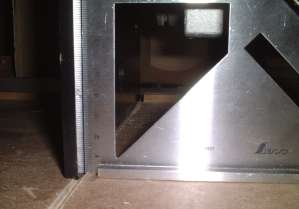
Square the Plate to the Fence
Use a good carpenter square. Make sure the plate stays square to the fence as the blade moves in and out. If using the carpenter square, check to see that the plate is perpendicular to the fence. If is it not, do NOT adjust the radial arm. The reason it is crooked is that the motor assembly is not parallel to the radial arm. You will have to loosen the motor mount (a.k.a. the “yoke”) and swivel the motor so the plate lines up with the square. Move the saw in and out to check your work.
Square the Plate to the Table
Use a reliable square and adjust the blade square to the table.
Replace the Blade and Guard
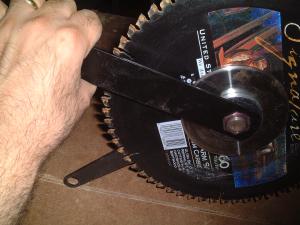 This is the safest technique for loosening or tightening the nuts on a Delta saw. One wrench is anchored on the table and the other wrench is moved with the hand. This way, if the wrench slips, you won't hit your hand on the sharp blade.
(BTW, look at all of the pitch on the blade-I guess it's time to clean it and maybe have it sharpened!)
This is the safest technique for loosening or tightening the nuts on a Delta saw. One wrench is anchored on the table and the other wrench is moved with the hand. This way, if the wrench slips, you won't hit your hand on the sharp blade.
(BTW, look at all of the pitch on the blade-I guess it's time to clean it and maybe have it sharpened!)Your blade is very close to square, but you'll still need to cut some wood and check it- you'll probably need to make some minor adjustments.
Alignment Jig

Once adjusted, you might be tempted to leave it as-is, which probably won't solve your problem in the long run since the arm of the saw can be knocked out of alignment pretty easily.
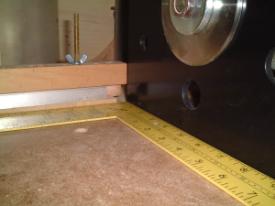
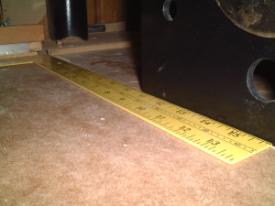
The way I deal with this problem is with an alignment fixture. It fits over both ends of the saw table and it has a kerf cut partially though that shows where the blade should be if it is properly aligned.
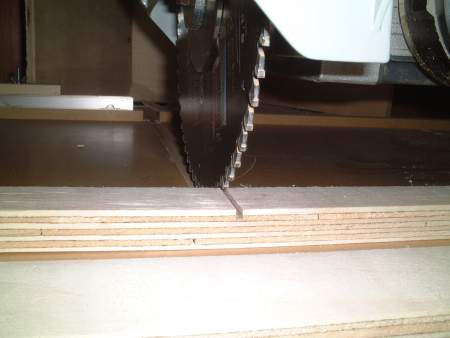 Because I am aligning the blade with the blade in its extended position, it is much easier to be accurate. The only drawback is yeah, you have to get the saw in alignment to make the fixture in the first place. However, once the fixture is constructed, it will keep your saw aligned for years to come.
Some Final Thoughts
This page started out as just a few words describing the alignment jig, but there were so many questions about how to align a radial arm saw that I described the alignment procedure I use in my own shop. Unfortunately, the description was brief (at the time I was running out of web space) and there was a bit of misinterpretation. So, to silence the skeptics, I have added a few more details.