


an Open Back Banjo
PART III: Creating and Attaching the Fingerboard
The beginning luthier or one-time instrument builder will find it more economical to buy a pre-slotted fingerboard. It is possible to cut the slots yourself, but you can spend a lot of time and money, and if you make even slight mistakes it will ruin the intonation of your instrument.
Inlaying the fingerboard, on the other hand, might be worth the while. You can inlay simple dots by drilling holes in the proper position (a drill press really helps in this operation) and gluing the dots in place with epoxy or white glue. Or, if you want to be a bit fancier, you can use pre-cut diamond inlays.
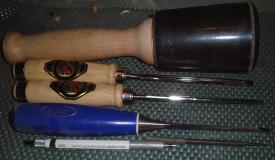
For this method you'll need a mallet, machinist's scribe, some sharp chisels, and a mechanical pencil.
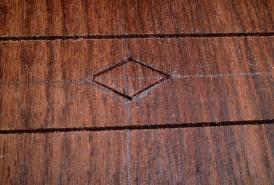
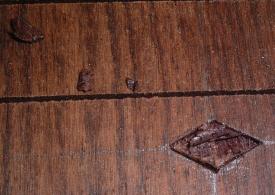
Hold the diamond in position with the scribe and trace around it with the pencil.

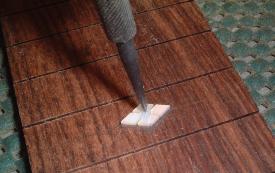
Lay a chisel just inside of the pencil line and tap it with the mallet.
Do this on all four sides, then go around another time or two to deepen your cut.
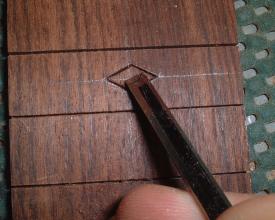
Remove the material from the middle with the chisel. This is easy with a sharp chisel, impossible with a dull one.
Don't use the mallet and don't hit the end of the chisel with your hand-it's a slicing action. Cut from the center to the edge, and, if necessary, deepen the edge cuts as you go.
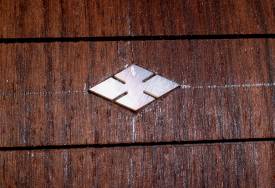
Test fit the inlay to see if it fits in the cavity. It should stick up just a hair above the fingerboard so you can sand it flush later.
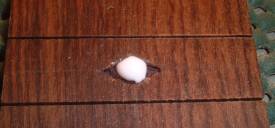
A drop of glue gets things going.

Some rosewood dust (from the waste part of the fingerboard) is spread into the glue to make a paste. This will fill in any small gaps.
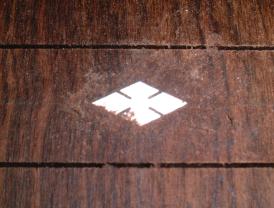
When the glue dries it will look something like this. At that point, sand it flush with a sanding block and medium sandpaper.
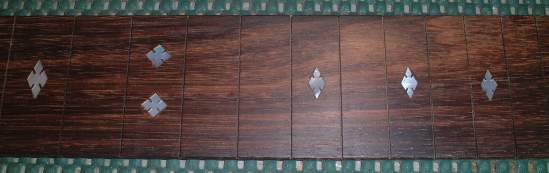
When the whole fingerboard has been inlaid, go ahead and sand it with fine and then extra fine sandpaper, the finish up with 0000 steel wool to buff the pearl.
You can inlay even fancier designs by cutting your own mother of pearl and routing the inlay cavity with a Dremel tool. To learn how to do that, click here.
If you'd like a fancy fingerboard but you aren't up for that much work, you can buy pre-inlaid fingerboards from First Quality.
Cut the fingerboard to its approximate shape and sand it to its final form.
Put the bone nut blank in place and check to see that the fingerboard and neck align perfectly. The neck should be slightly wider than the fingerboard. When you are absolutely sure everything is going to be okay, glue the fingerboard to the neck. I find it helpful to tape the fingerboard in place after it is glued but before I have applied the clamps. Use wooden pads on both the neck and the fingerboard to protect them from the clamps, and be sure you don't put any clamps over your pearl inlay or you'll crack it.
When the glue is dry, use a sanding block or a rasp (but only if necessary) to make the neck match the fingerboard. Sand everything smooth.