


Part Two: Building the Trestle Base
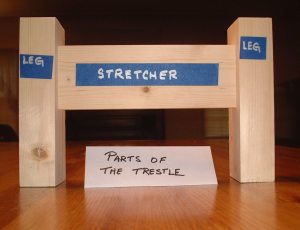
While the glue dries, Iĺll set the top aside and work on the base.
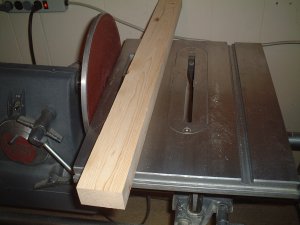
I had a bad spot on the edge of this board, but it only took a couple of seconds to clean it up with the disk sander. Looks great now, doesnĺt it?
After a little more work at the table saw Iĺve got all of the boards I need to make the trestles.
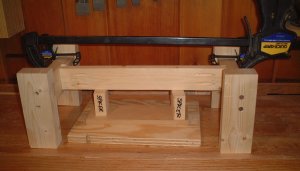
This is where the Shopsmtih has it over other machines. Assembly of the trestles takes place right at the Shopsmith. Iĺll drill holes (using then Shopsmith in horizontal boring mode) and then put in screws while everything is still clamped and lined up. It virtually guarantees that everything will be square.
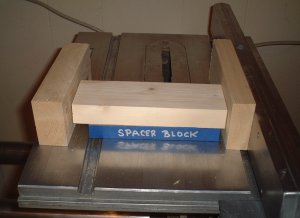
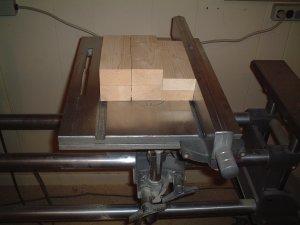
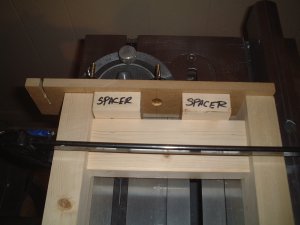
Rather than spend a lot of time mindlessly measuring, Iĺm using spacer blocks. These are just scraps of wood that I have around the shop.
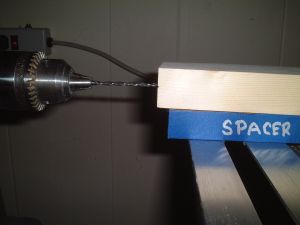
Before I get everything set up, I want to make sure that Iĺll be drilling near the center of the board. Again, no measuringŚIĺm just eyeballing this. Once I lock the table height, I know that all my holes will line up and they will be the exact same distance from the bottom of the legŚwithout measuring!
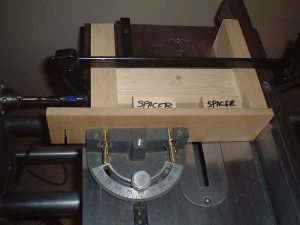
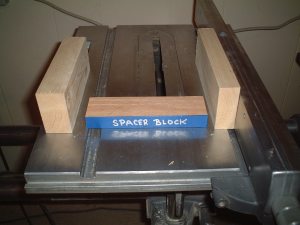
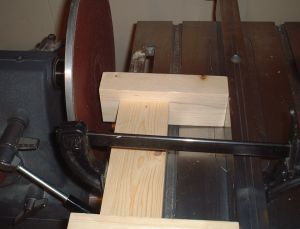
A couple more spacer blocks determine the distance for the stretcher bar. Notice how Iĺm using the miter gauge and rip fence to keep things square. A single clamp holds things in place.
Iĺm drilling the pilot holes and counterbores before changing the setup. I donĺt have stepped bit, so I just swap bits, drilling the larger hole first. Due to the precision of the Shopsmith, I can change bits and drill the second hole right on center with the first.
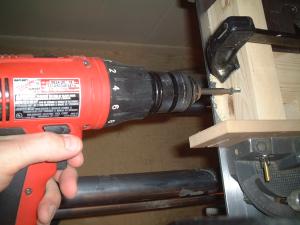
With everything still clamped in place, I pull the headstock back and screw the pieces together. Because I havenĺt changed the setup, I know the pieces will be lined up and square as I screw them together.
Iĺm repeating the same operation on the other side of the trestle so the setup is slightly different.
The ends of the boards will be visible, so Iĺm using the disk sander to smooth things out. Itĺs almost the same setup as the drilling operation, so Iĺm doing the sanding now.
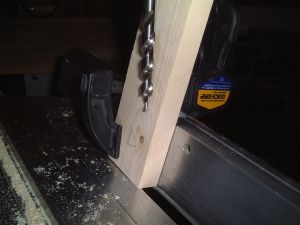
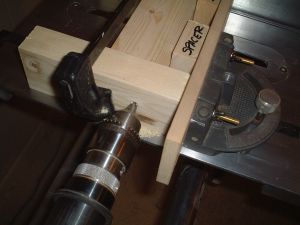
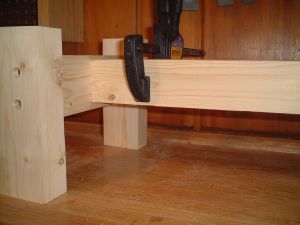
Screws set in angled pocket holes will hold the stretcher in place. The easiest way to drill these is with the Shopsmith set up as a vertical drill press. The table is tilted about 15 degrees off vertical, which creates an angled hole. The bit I am using is from a Kreg jig, and you can get it (the bit, not the jig) for about fifteen bucks at a home center near you. You could also use a Forstner bit for the large part of the hole and a brad point bit for the narrow part.
Once again, I am using spacer boards and a clamp to hold things together while I fasten the screws.
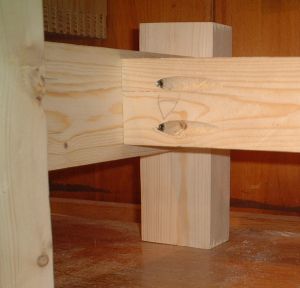
The pocket holes work well, but they sure are ugly.
Iĺm gluing on a half inch layer of wood to hide the pocket holes and make it look like I used a blind mortise-and-tenon joint.
![]()
![]()