


an Open Back Banjo
Here is a brief description of my building process. In addition to these instructions, you should also purchase Don MacRostie's Mastertone banjo blueprint and Roger Siminoff's book, Constructing a 5-String Banjo. Both are available from Stewart MacDonald.
It is also very helpful if you purchase all your materials in advance, although this is not absolutely necessary.
PART I: BUILDING THE BANJO NECK
Cutting and shaping the neck is my favorite part of building a banjo, and I enjoy every step of the process. If you're a patient or at least a persistent person, you can do a really nice job. The only thing you can't do is to be is in a big hurry, and if you're that kind of person, you might as well take up a faster-paced hobby, such as fishing or chess.
STEP ONE: Gluing up the block.
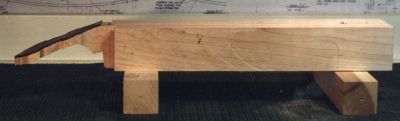
Finding the right piece of wood for a banjo neck can be a challenge. In order to make a "typical" banjo neck out of a block of solid wood, you would need a block about 3 1/2" wide, 3" thick, and 28" long, and just to give yourself a little elbow room, you might want something a bit larger.
 Any one of several woods can be used to make a banjo although maple seems to be the most common. Maple can either be soft maple or rock maple. Rock maple has a higher stiffness rating, although neither wood is particularly stiff. Classifications such as curly maple or birds-eye maple are actually references to the pattern of the grain, and although they are very attractive, highly figured woods might make the neck less stable.
Mahogany is a less common choice, but still a viable option. It is more stable than maple, which is good, but it is not as stiff as maple, which is not so good. It is a darker wood, with a reddish-brown color. Unlike maple, it has open pores which should be filled, and that adds an extra step to the finishing process.
Walnut is a sort of "in-between" wood. It isn't as stable as mahogany, but doesn't move quite as much as maple. It is stiffer than mahogany and soft maple, but not quite as stiff as rock maple. Like mahagony, it has large pores which should be filled.
Cherry is another option, with properties similar to maple. Cherry is tends to have a straight grain and a fine, even texture. Some people report finishing problems with cherry, but I find that a thin coat of shellac seals the wood and from there it is easy to finish.
Although no wood is perfect, any of the woods can produce an excellent neck.
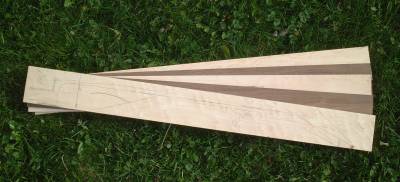
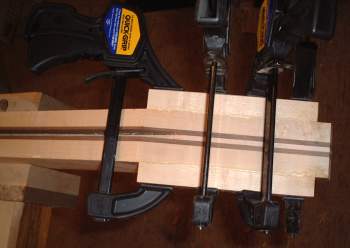
In order to combat the problems with stability, I generally laminate the neck from three pieces of wood: two thick pieces of maple (1 7/8 x 3 x 29 ) and a thin (1/8" x 3 x 29) strip of walnut, glued with the walnut sandwiched between the maple. For reasons of stability, I prefer to cut the maple boards from a wide board (1 7/8 x 6 1/4 x 29).
I find it helps to let the stock sit around for a while after its been glued up. Some builders rough cut the neck and let it sit around for a year. Then, if it seems to be stable, it becomes a banjo neck. A year is a long time for an amateur builder to wait, but I would recommend that you take as much time as your patience will allow. You can work on the body or start inlaying the fingerboard while you're waiting.
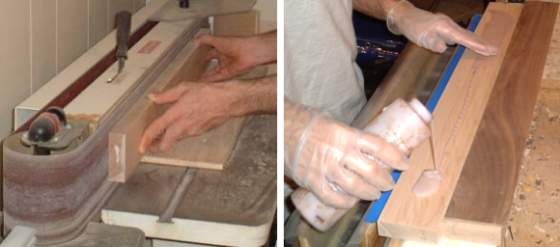
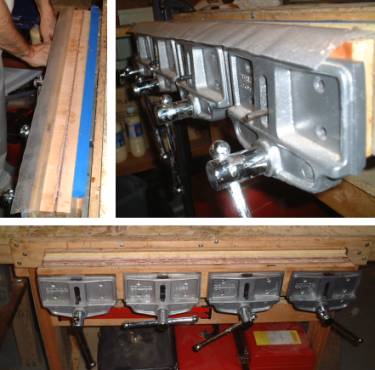
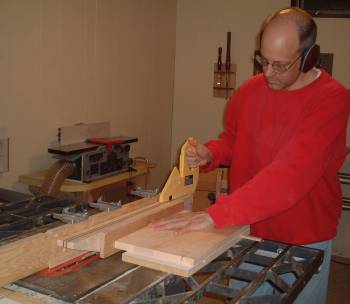
The actual process of gluing up a block of wood is pretty simple. Make sure the surfaces to be joined are flat and smooth. Spread a heavy layer of alaphatic resin glue on the surfaces, and clamp the whole together with lots of even pressure. You should squeeze out plenty of glue. The glue bottle says that you can remove the clamps in ten minutes to half an hour, but I wait much longer, at least overnight and usually twenty-four hours. Clean up as much of the excess glue as possible, working a damp rag or chisel around the clamps.
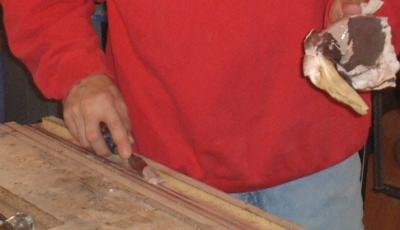 If you do have excess glue remove as much as you can with a chisel or cabinet scraper. Alaphetic Resin glue has a blunting effect on tools, so try to remove most of it before squaring up the stock with a jointer, sander, or hand plane. Using some ingenuity you might be able to clean up and square the block with your table saw, but make sure you know what you're doing before you try this. In the end you should end up with a block which is at least 3 1/2 inches wide, 3" thick, and 28 long, and a little larger would be better.
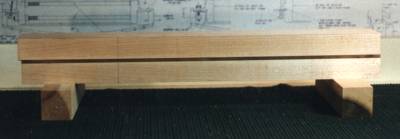
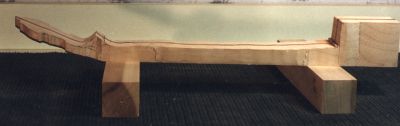
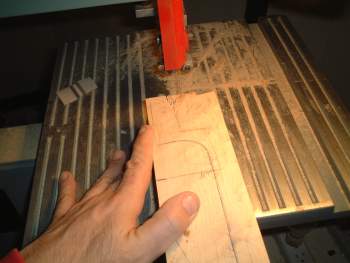
STEP TWO: LAYING OUT THE PATTERN
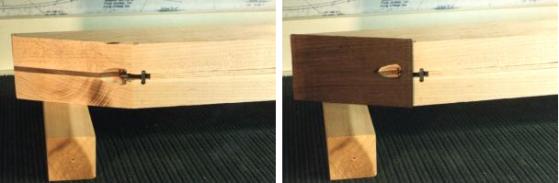
Carefully examine the block. Try to determine the best place for the peghead and heel. Swirls and curls in the grain can look very interesting, but they do make the neck less stable. For that reason, I try to cut the neck so the big variations in grain are down by the heel, where the wood is thicker and less likely to warp.
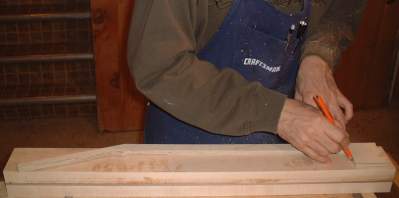
Use your blueprint to make a wooden or Plexiglass template. Trace the pattern onto your hunk of wood. You might find it helpful to trace the pattern on both sides, but if you do, take careful measurements and line up the template accurately.
STEP THREE: REFINING THE BLOCK AND INSTALLING THE TRUSS ROD
The first cut is the angled cut which creates the face of the peghead. You can cut this on the band saw and sand it flat or you can cut it on the table saw using a jig to guide the wood through the saw.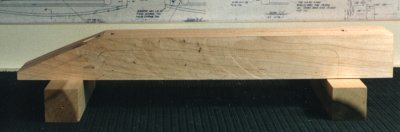
Next, cut the slot for the truss rod. I use a Stew-Mac Hot Rod and that requires a simple slot which can be cut on the table saw or router table. No matter which truss rod you use, install it according to the supplied instructions.
When you're finished, glue the peghead veneer in place.
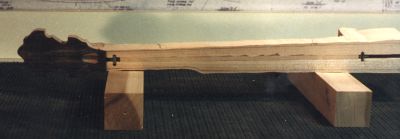
STEP FOUR: CUTTING THE NECK TO ROUGH SHAPE
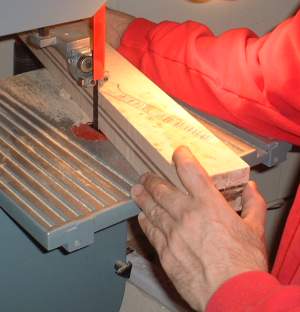
 I suppose there are many ways to cut out the neck, but the following is a method that works well for me. Like most builders, I begin with the peghead. I cut the peghead to rough shape on the band saw
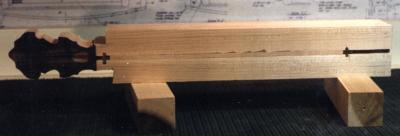 and finish by sanding to exact shape with my spindle sander. however, for my first instrument I used a piece of sandpaper wound around a pencil, and that worked fine.
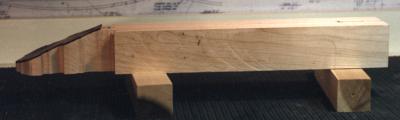
Cutting the rest of the neck with the band saw isn't too difficult, but it does take some planning. The trick is to plan your cuts so that you've always got a flat side of wood against the table of the band saw. As the neck takes shape, and the flat sides get cut away, this becomes kind of tricky. It helps if you have a plan of attack. Also, it is wise to cut the neck at least 1/16" larger than the pencil line.
Okay, don't miss that, because it's important. Cut the neck at least 1/16" wider than the pencil line.
Start by turning the neck block on its side and cutting the peghead to thickness.
With the neck block still on its side, cut the rough profile of the neck. Save the scap wood.
 Tape the scrap wood back in place and turn the neck block "fingerboard" side up. Cut the left long edge of the banjo, the one which has the fifth string "bump."
Re-apply the tape and cut the long right edge of the neck.
STEP FIVE: DRILLING THE TUNING PEG HOLES
Using a brad point drill bit and a drill press, drill the holes for the tuning pegs. In order to minimize tearout, you can drill a tiny hole all the way through and drill from both sides of the peghead.
The hole for the fifth string is a bit trickier. I use my ShopSmith in horizontal drill press mode, but you can use any drill press by clamping the neck to a block of wood. This is more complicated than it sounds. You'll probably have to clamp or screw smaller blocks to the main block to keep the neck from moving.
Incidentally, this is one case where Roger Siminoff is dead wrong. He suggests drilling a smaller hole and enlarging it, but that is a recipe for disaster. Use a brad point bit and drill the hole the correct size from the start.
STEP SIX: SHAPING THE NECK
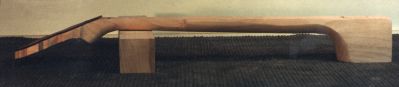 Using rasps, sandpaper, and maybe a drawknife, get the neck very close to its final shape. Leave it slightly wider than the fingerboard so the two can be fit together.
THERE'S MORE THAN ONE WAY TO SKIN A CAT
I don't always follow the same procedure. There are many ways to build a banjo, and they all work.
If I'm building a resonator banjo, I'll shape the heel on the band saw while the block is still square. For an open back instrument it isn't necessary.
You can use a smaller block of wood if you glue "ears" on your peghead.
Put the neck aside for at least a month. In fact, now is the perfect time to build the body.